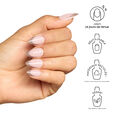
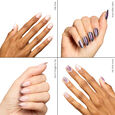
1. CHOOSE THE RIGHT NAIL SIZE
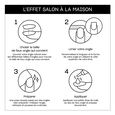
Try the different nail sizes over your natural nail to find the right fit.
Pro tip: Choose a smaller nail if you’re between sizes.
2. FILE YOUR NAIL
Customise the length and shape of your nail using the top of your file.
3. PREPARE
A successful application starts with well-prepared nails! Start by removing your nail polish if necessary.
Filing: You may need to trim or file your natural nails shorter to ensure the false nails fully cover them. Use the top of your file.
Buffing: Lightly buff the surface of your nail using the top of your file.
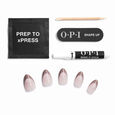
Wiping: Remove dust from your nails with the Prep xPress wipe.
Pushing back: Gently push back your cuticles with the manicure stick.
4. PRESS ON THE NAIL
Application: Remove the glue cap, squeeze it gently and apply a small amount of glue to the back of the false nail.
For longer wear, apply glue to the back of the false nail and to your natural nail.
Pro tip: For short-term wear, apply glue only to the back of the false nail. Align the bottom with your nail and place it close to your cuticles.
Hold down for 30 seconds, applying pressure to all sides of the nail. If any glue oozes out, quickly wipe it away using your cuticle stick.
5. EASY REMOVAL
The false nails will come off naturally with wear and over time, but if you need to change your manicure quickly, here’s how: soak the nails in warm water with 10 drops of Huile Eclat pour Ongles et Cuticules Nature Strong for 10 minutes. Using the cuticle stick, gently lift the edges of the nails without forcing them. If the nails do not come off easily, apply a small amount of acetone to the base of the nail using a cotton bud.
Pro tip: To reuse them, avoid using too much acetone.