How to apply your Perfect Press-On false nails?
Step 1: Finding the Right Fit
Each kit contains 30 capsules in different sizes; try them on and choose the right ones for each of your fingers. You should position the tip with the hardest, thickest side facing the top of the nail and the roundest, most flexible side facing the cuticles. The tips are numbered by size from 0 (the widest) to 9 (the thinnest; up to 11 depending on the model). The numbers are located on the back of the tip, at the top of the thickest side.
Step 2: Preparation
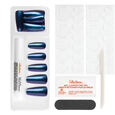
After thoroughly washing your hands, push back your cuticles with the included cuticle stick. Then, lightly buff the surface of your nails with the file to maximize adhesion. Finally, degrease your nails with the wipe.
Step 3: Application with Adhesive Pads OR Glue.
Application with adhesive pads:
Each kit contains 30 adhesive pads of different sizes: start by choosing the ones that fit your nails. Hold the pad by the tab and place it on your nail 1 mm from the cuticles. Massage it to warm the material and ensure it adheres, then remove the protective film.
Place the tip slightly under the cuticles, press it firmly from the bottom up, then massage for 30 seconds to prevent air bubbles.
Application with adhesive:
Apply a small amount of adhesive to the center of your nail and spread it with the tip of the tube to form a U-shape. Next, apply a small amount of adhesive to the inside of the tip, focusing on the part that will touch the nail. Place the tip slightly under the cuticles, press it firmly from the bottom up, then hold it firmly in place for 30 seconds.
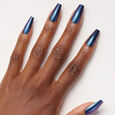
And there you have it—a professional-looking manicure in just a few minutes, it’s that simple!